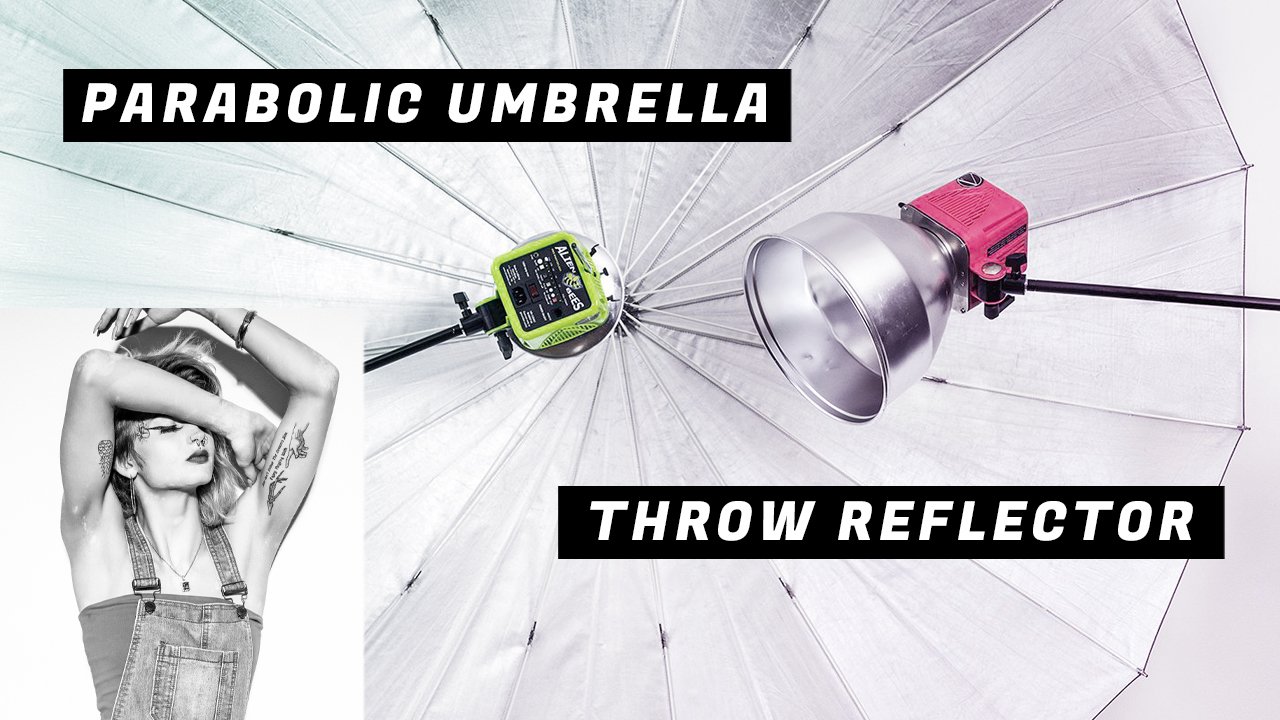
Parabolic Umbrella vs Throw Reflector
In this video we’re going to go over some photography lighting basics as we compare the lighting effects from two totally different studio light modifiers. The Parabolic Umbrella on one hand will deliver a very soft light while the Long Throw Reflector will focus a very bright light on your subject creating interesting shadows that can be used to accentuate image character. Lighting is so important in photography and this new video is a fist of many more to come where we examine different lighting setups and what situations they are best suited for. Subscribe to the channel if lighting is something you want to get better at.
In this shoot, I wanted to simplify things and compare two modifiers that sit on opposite ends of the lighting spectrum: a large parabolic umbrella and a focused reflector. If you’re new to studio lighting, this is one of the best ways to understand how light really works. And trust me once you see the difference, everything clicks.
Table of Contents
What Is a Light Modifier?
A light modifier is anything you attach to your light source to control how light spreads, softens, or focuses. In essence modifying the light. As a beginner, this is where your creativity really starts. The same light can produce completely different results depending on the modifier you use.
In this shoot, I used:
A large parabolic umbrella (86”)
An 11-inch throw reflector
Both were used in a one-light setup, which is perfect for learning.
Picture of a large parabolic umbrella (86”) and an 11-inch throw reflector both mounted on studio lights.
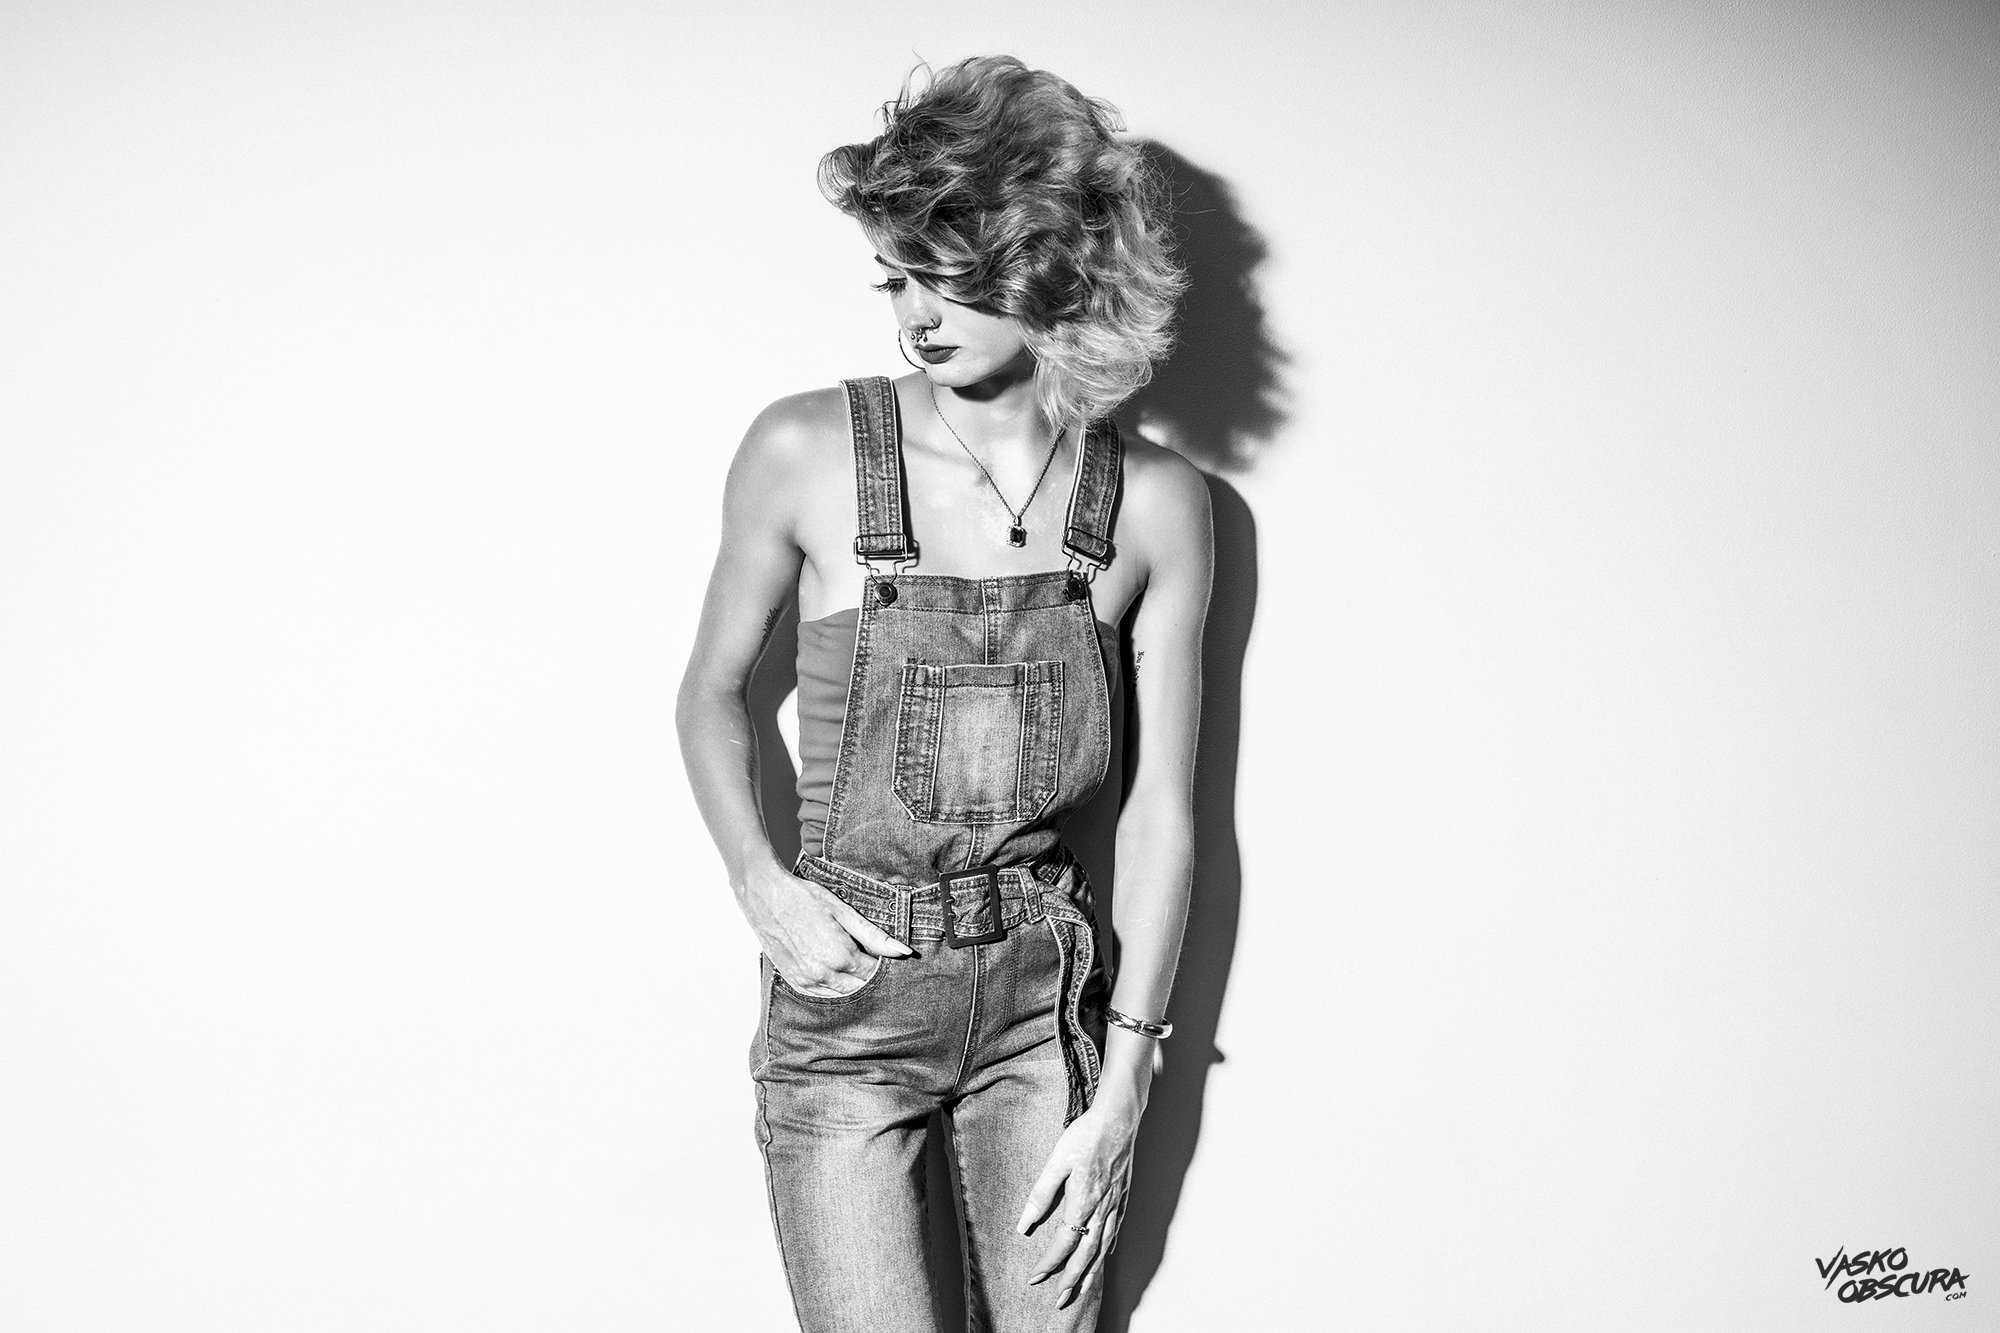
Parabolic Umbrella: Soft, Natural Light
The parabolic umbrella behaves a lot like window light and that’s why beginners love it. When I started shooting with it, the first thing I noticed was how soft and flattering everything looked. The bigger the umbrella the more the light spreads and the softer the light can get.
What it does:
Spreads light over a large area
Wraps light around the subject
Produces soft, gradual shadows
Creates a clean, natural look
Even when my model stood close to the wall, the shadows stayed subtle and controlled. Instead of harsh outlines, the light gently wrapped around her face and body. You can focus the light coming from a parabolic umbrella by sliding it closer to your light or moving it farther from your light.
Best for:
Portrait photography
Fashion shoots
Commercial work
Beginners learning lighting
If you want that bright, airy, professional look, this is your go-to.
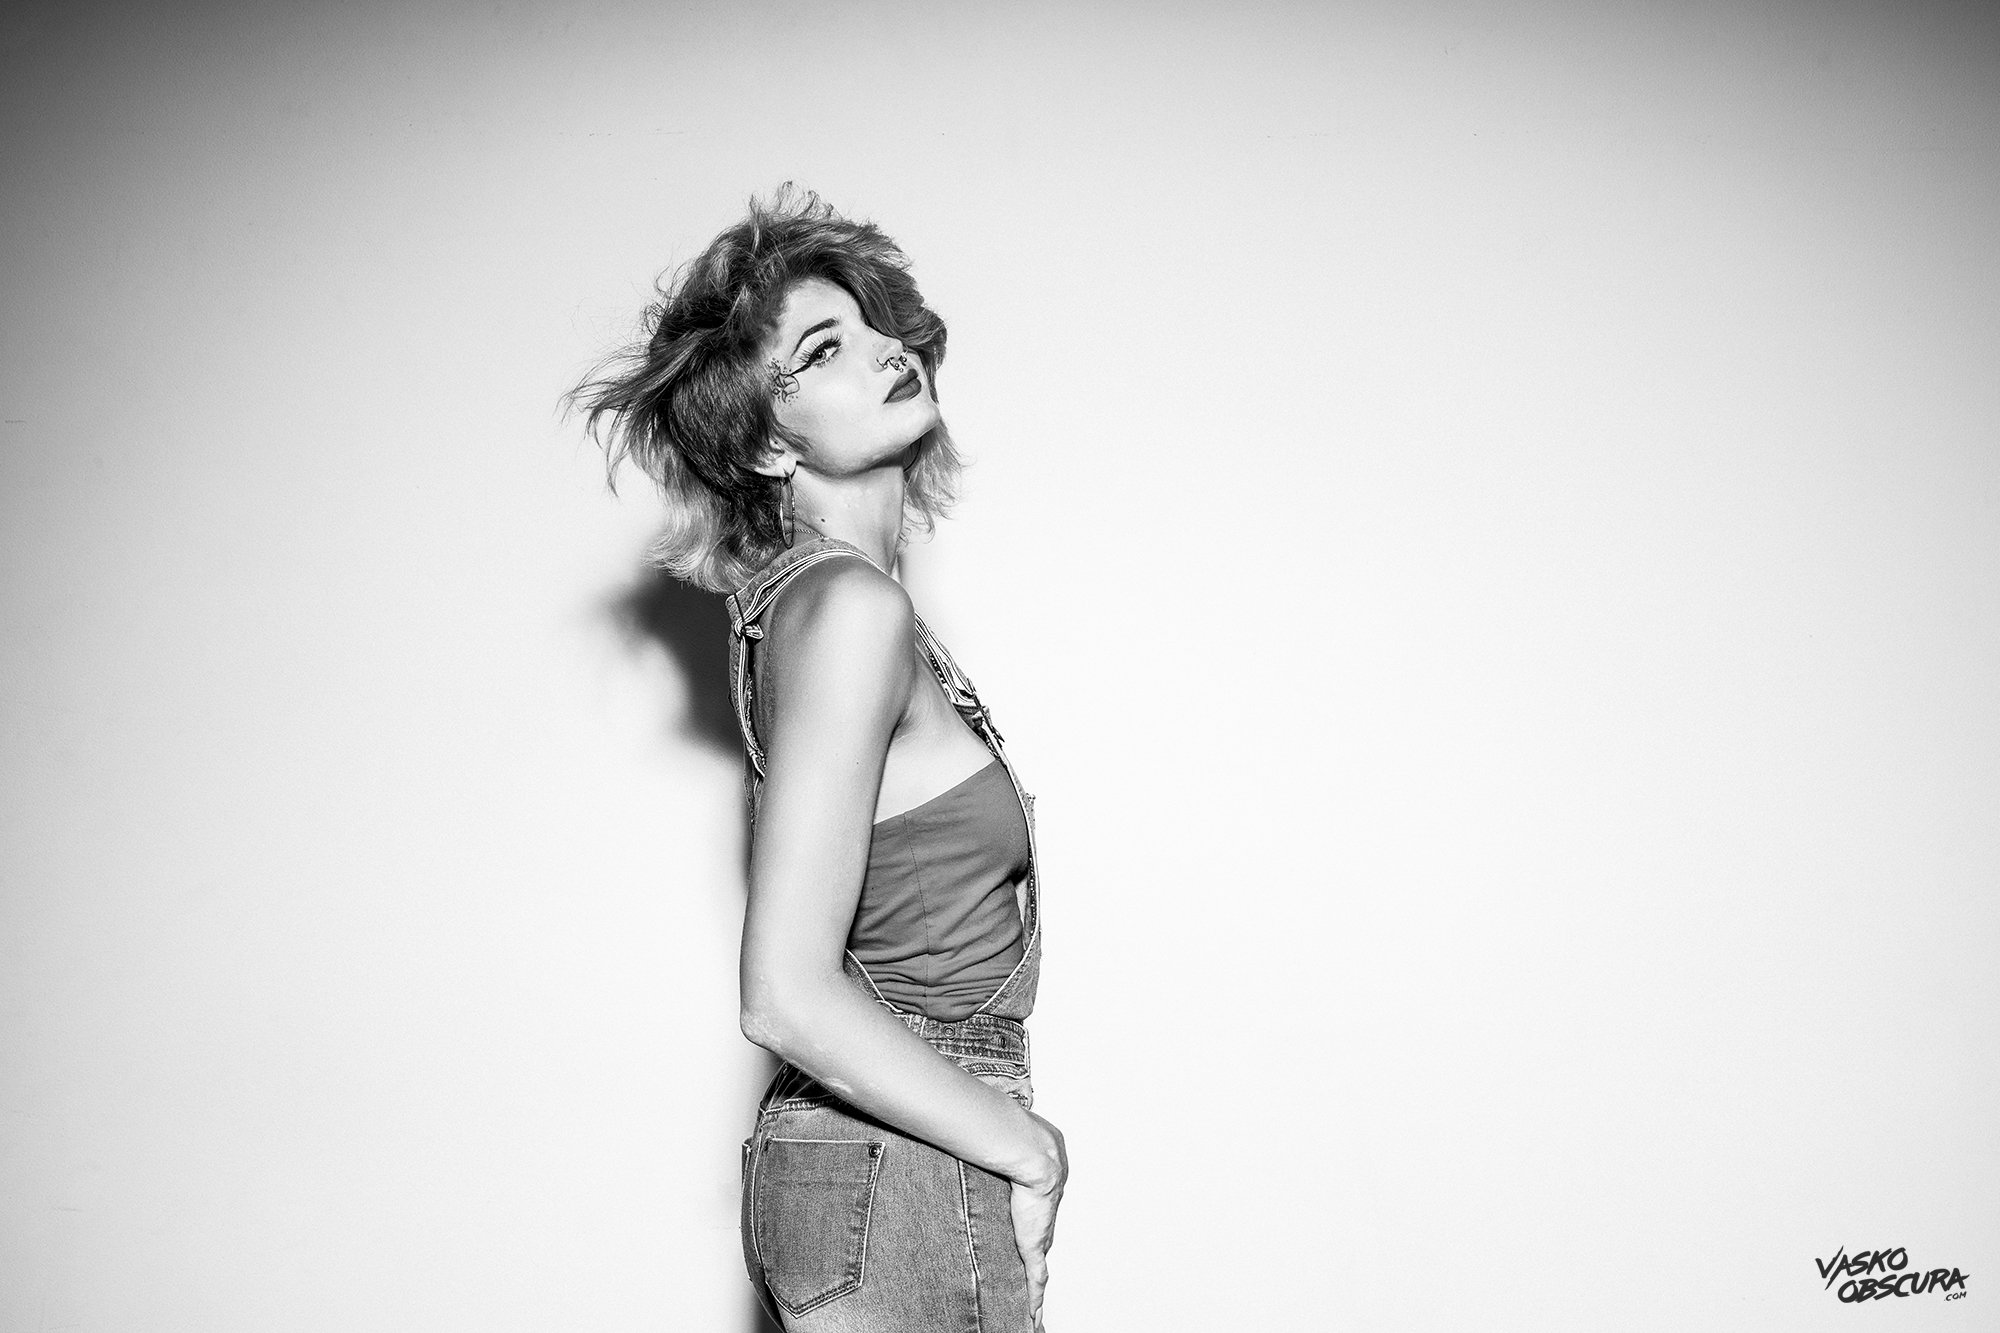
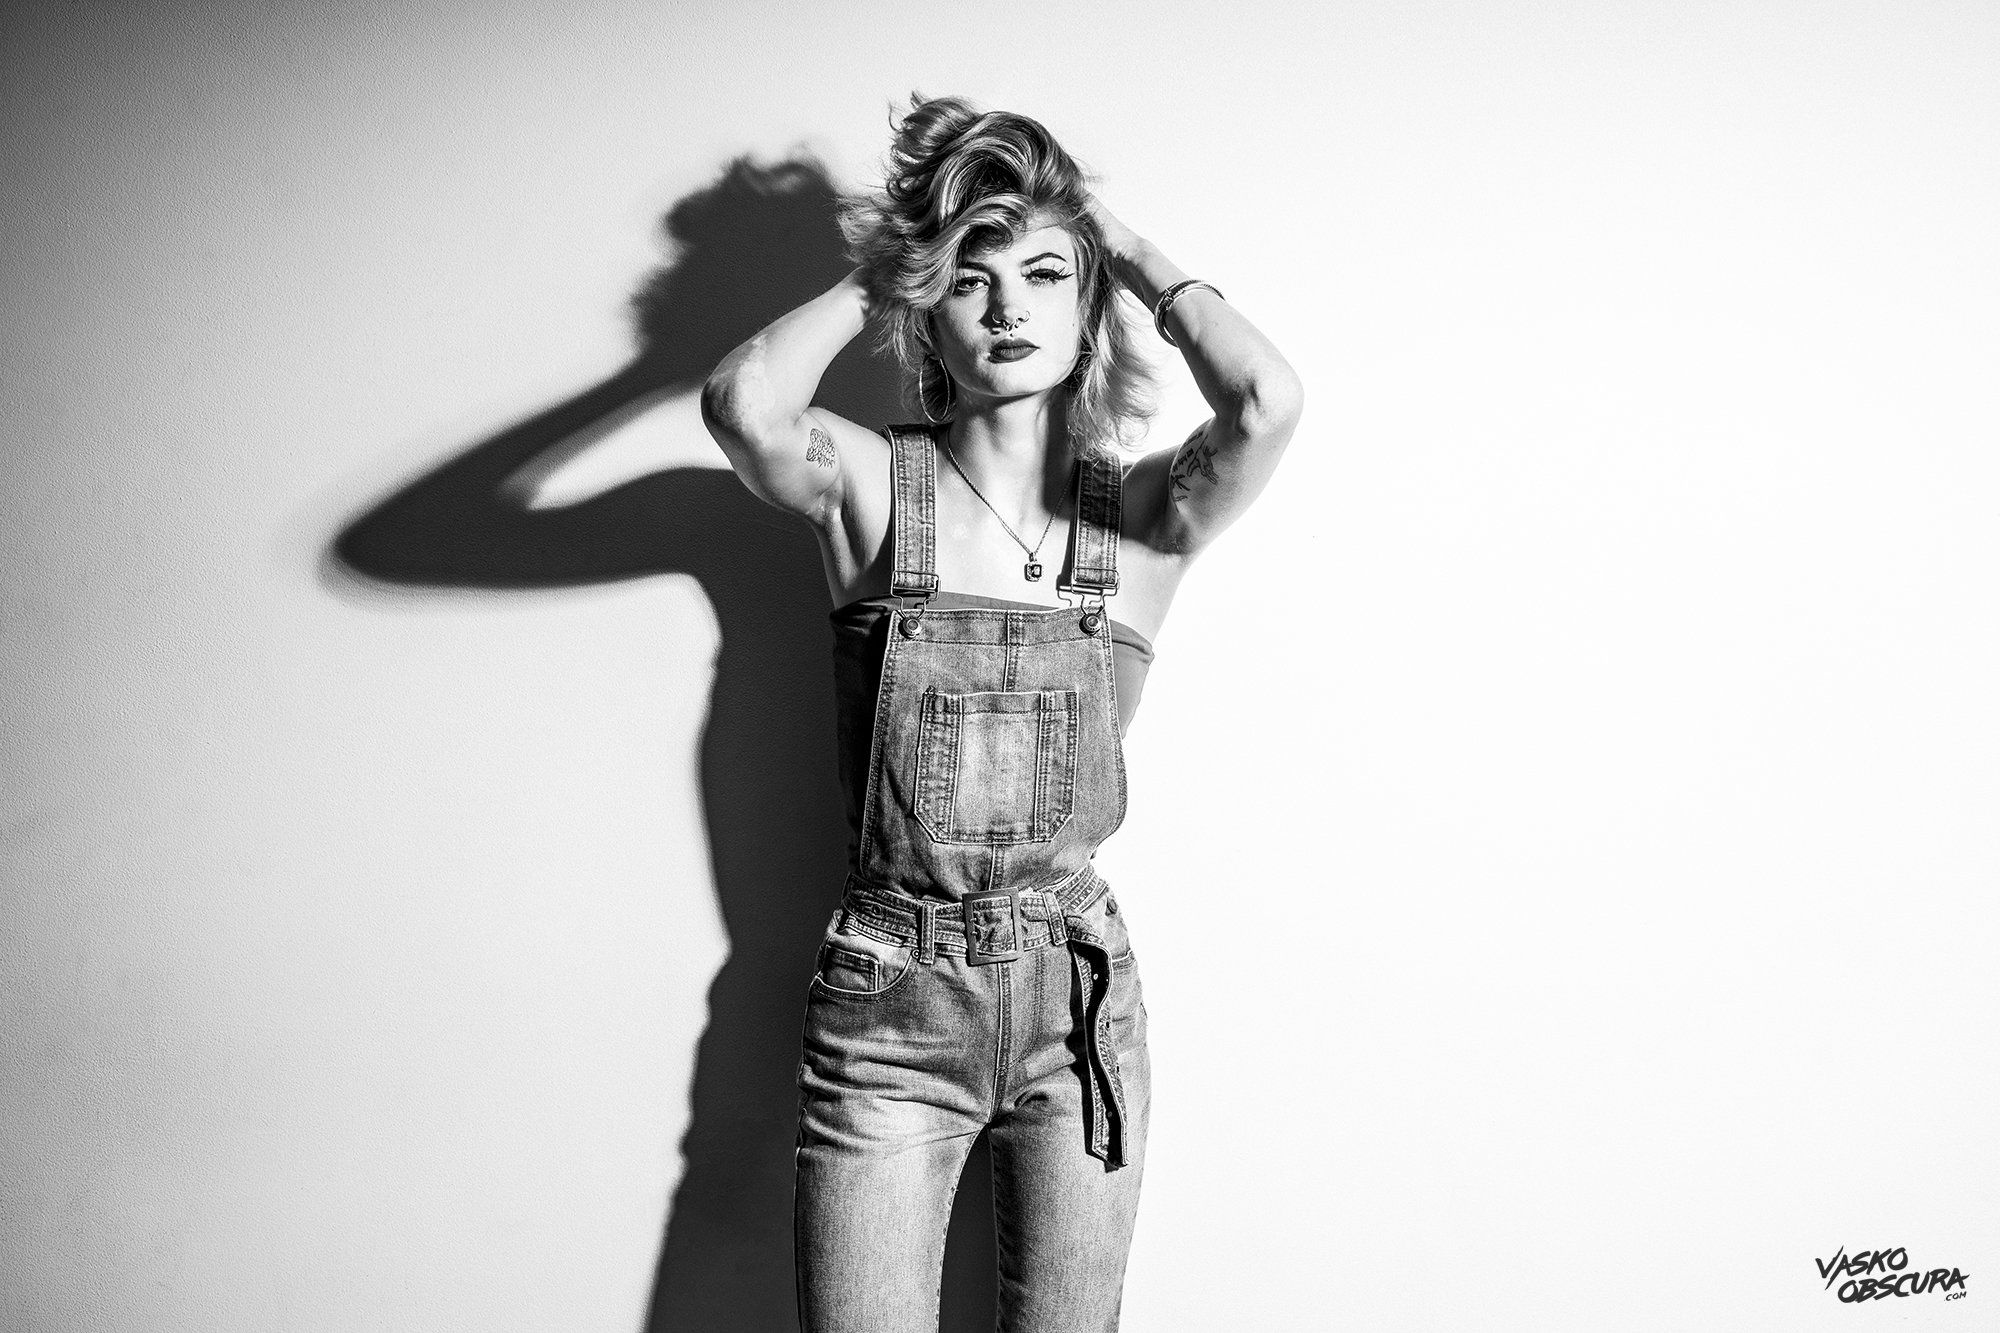
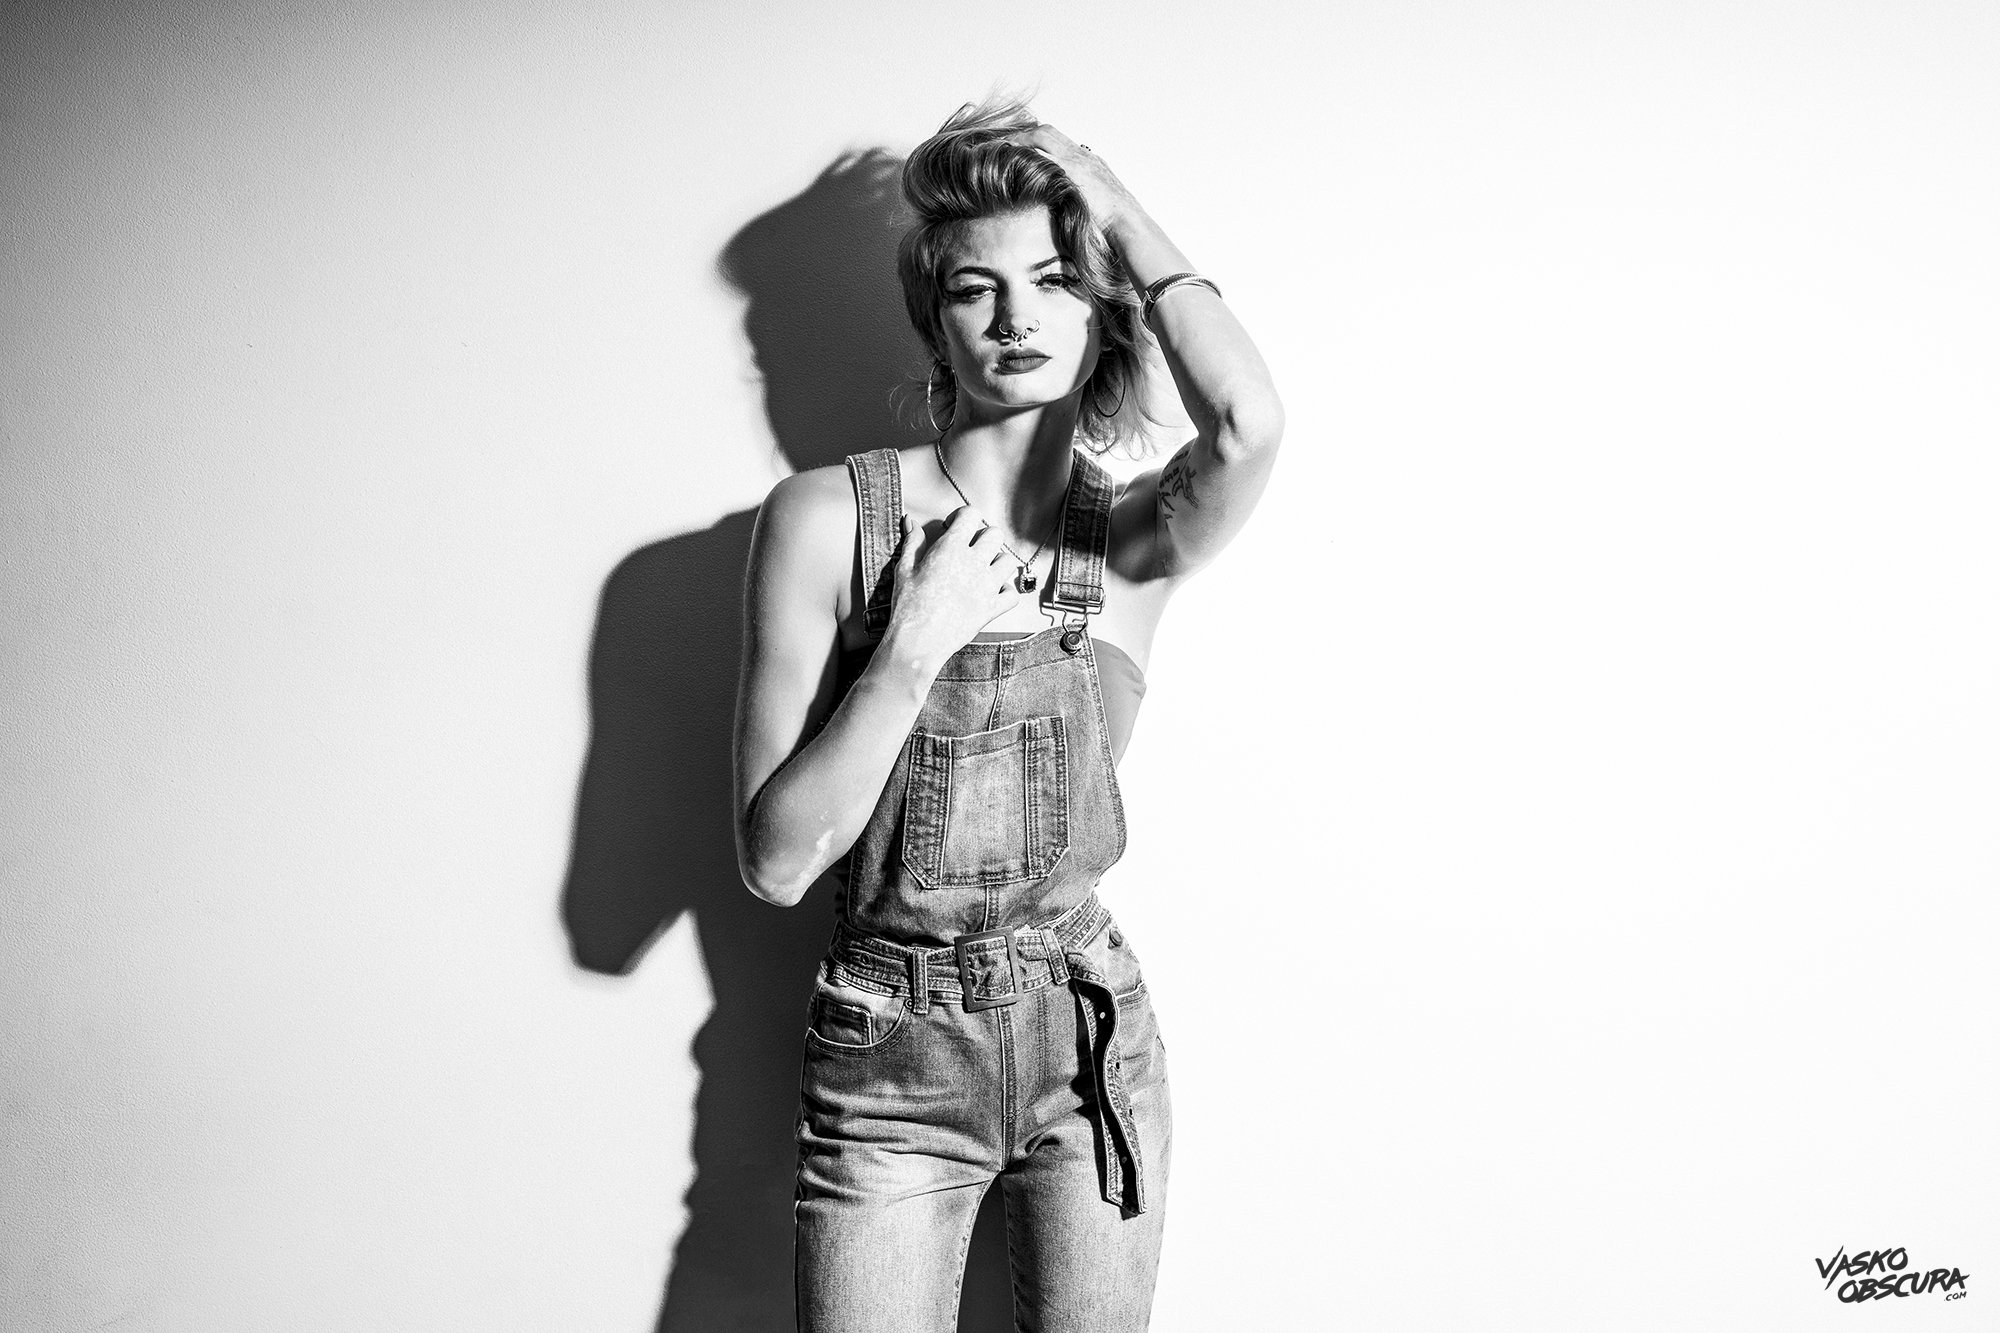
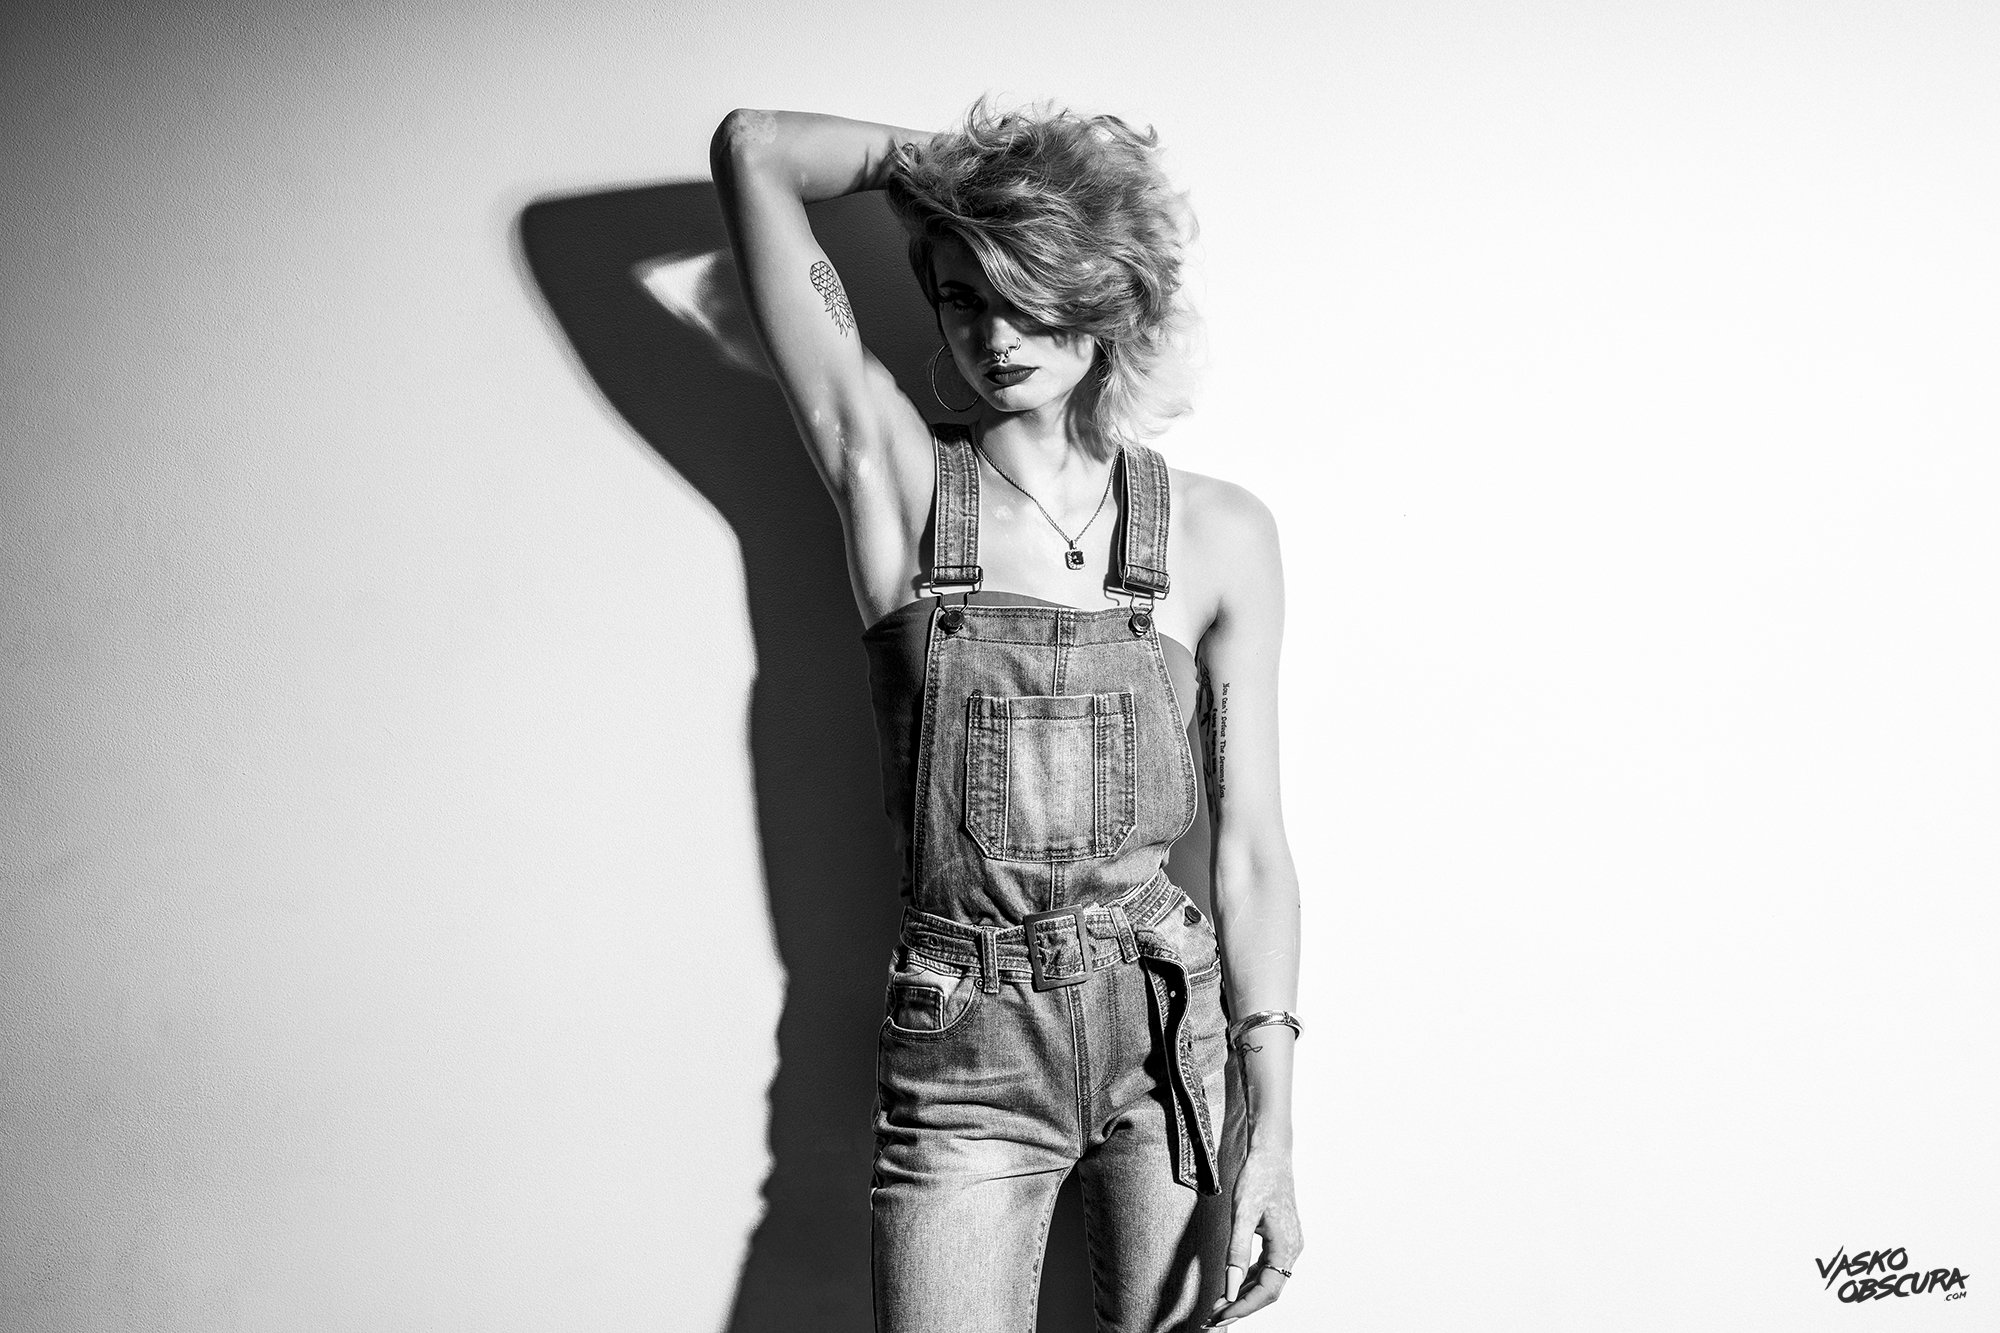
Reflector (11” Throw): Hard, Dramatic Light
Switching to the reflector completely changed the vibe. This modifier focuses light into a tighter beam, almost like a spotlight. Instead of soft gradients, you get sharp, defined shadows. Throw reflectors come in different sizes which can change how the light comes out of the reflector.
What it does:
Concentrates light into a specific area
Creates strong contrast
Produces hard-edged shadows
Adds mood and drama
I had to immediately lower my light power because all that energy was concentrated in one spot, something beginners often overlook.
Best for:
Dramatic portraits
Black and white photography
Editorial and fashion work
Creative shadow play
This is where lighting becomes storytelling.
Sample Images

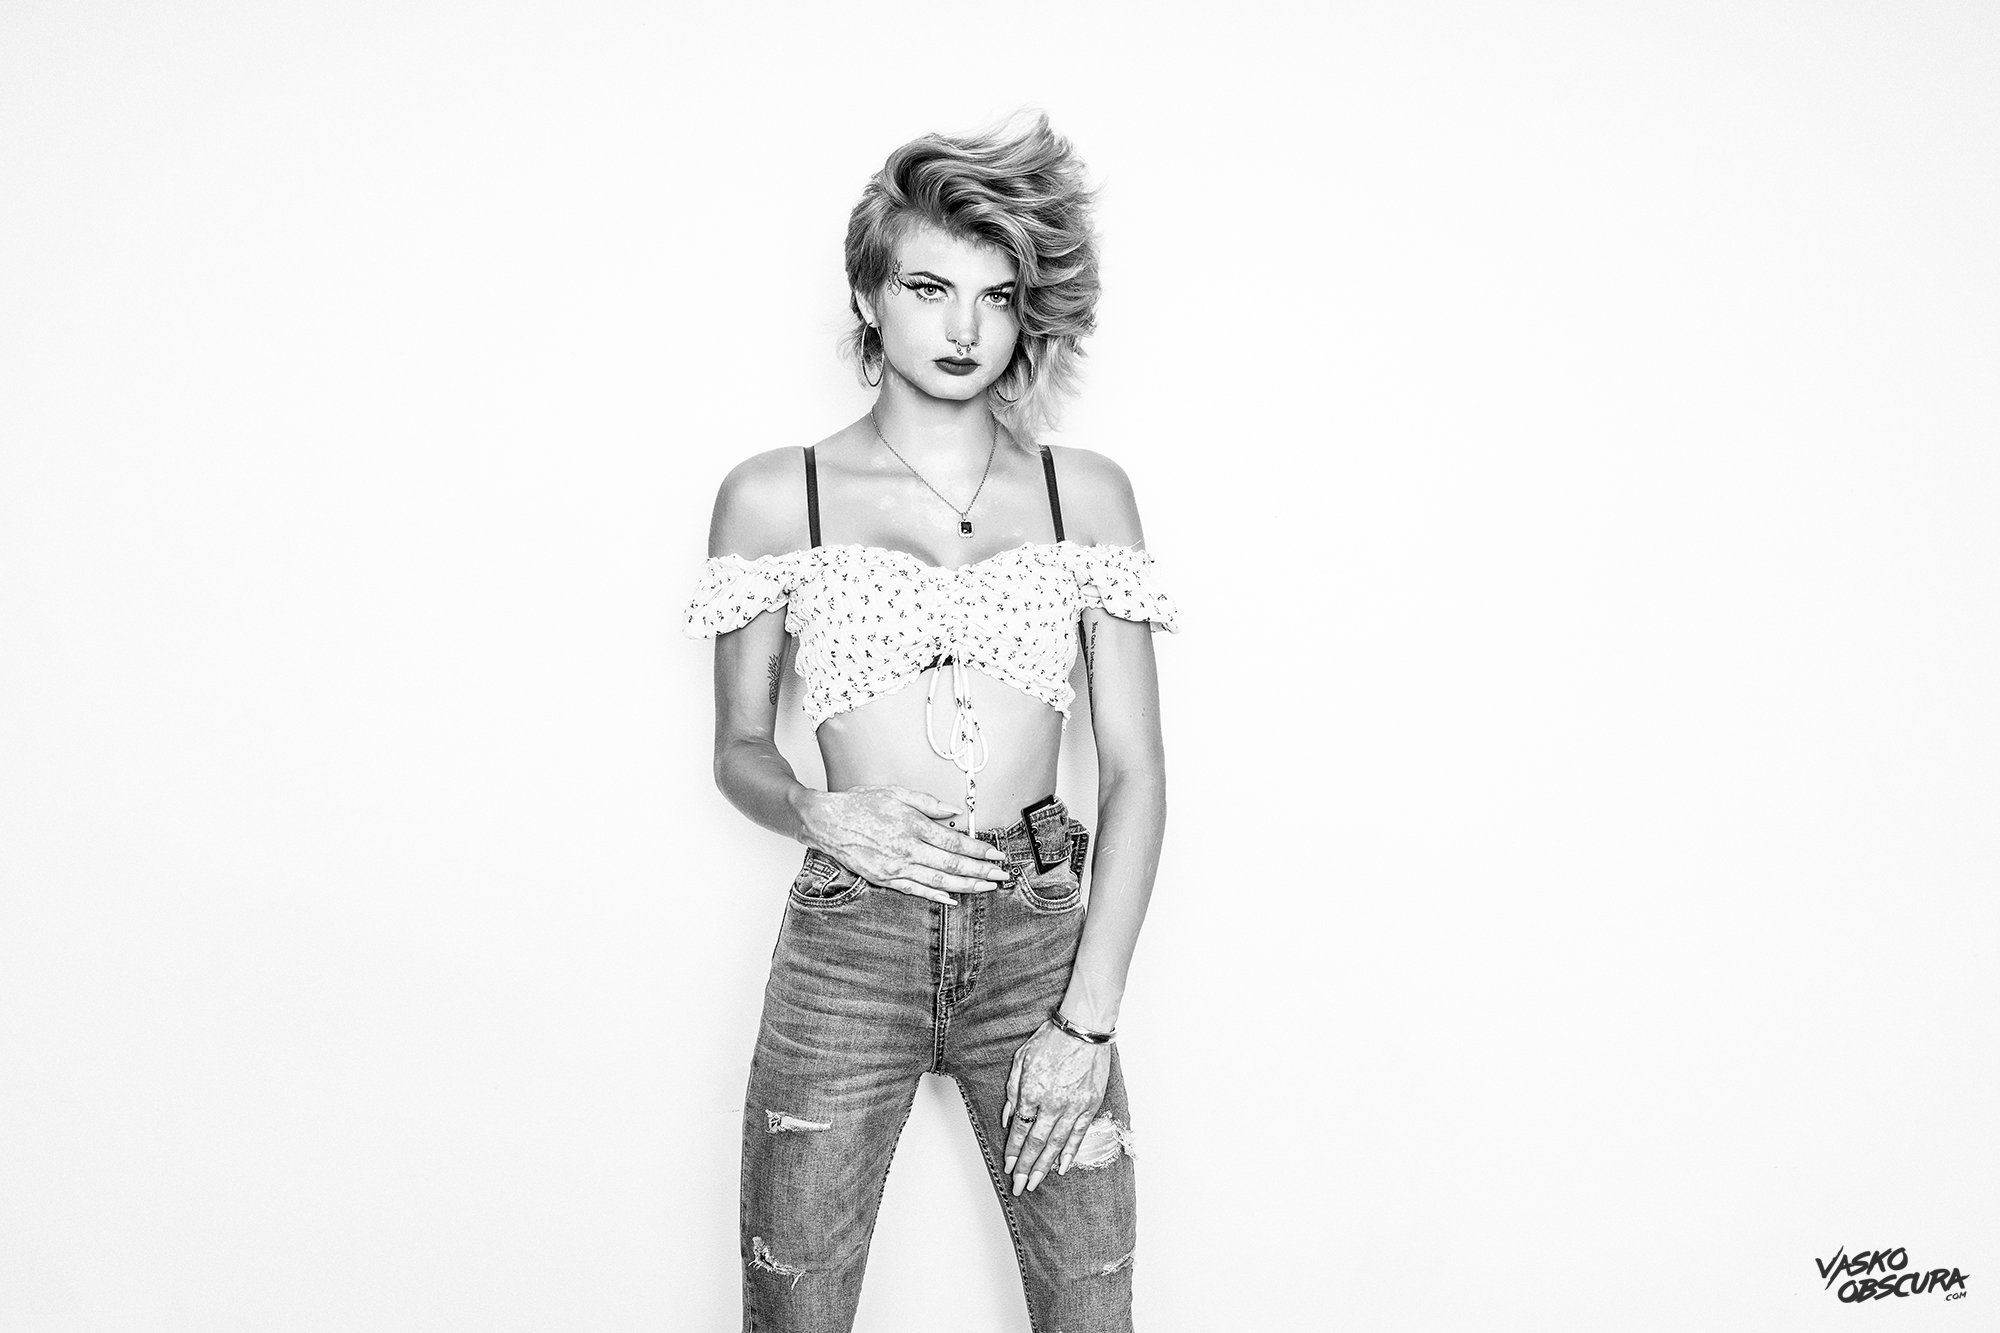


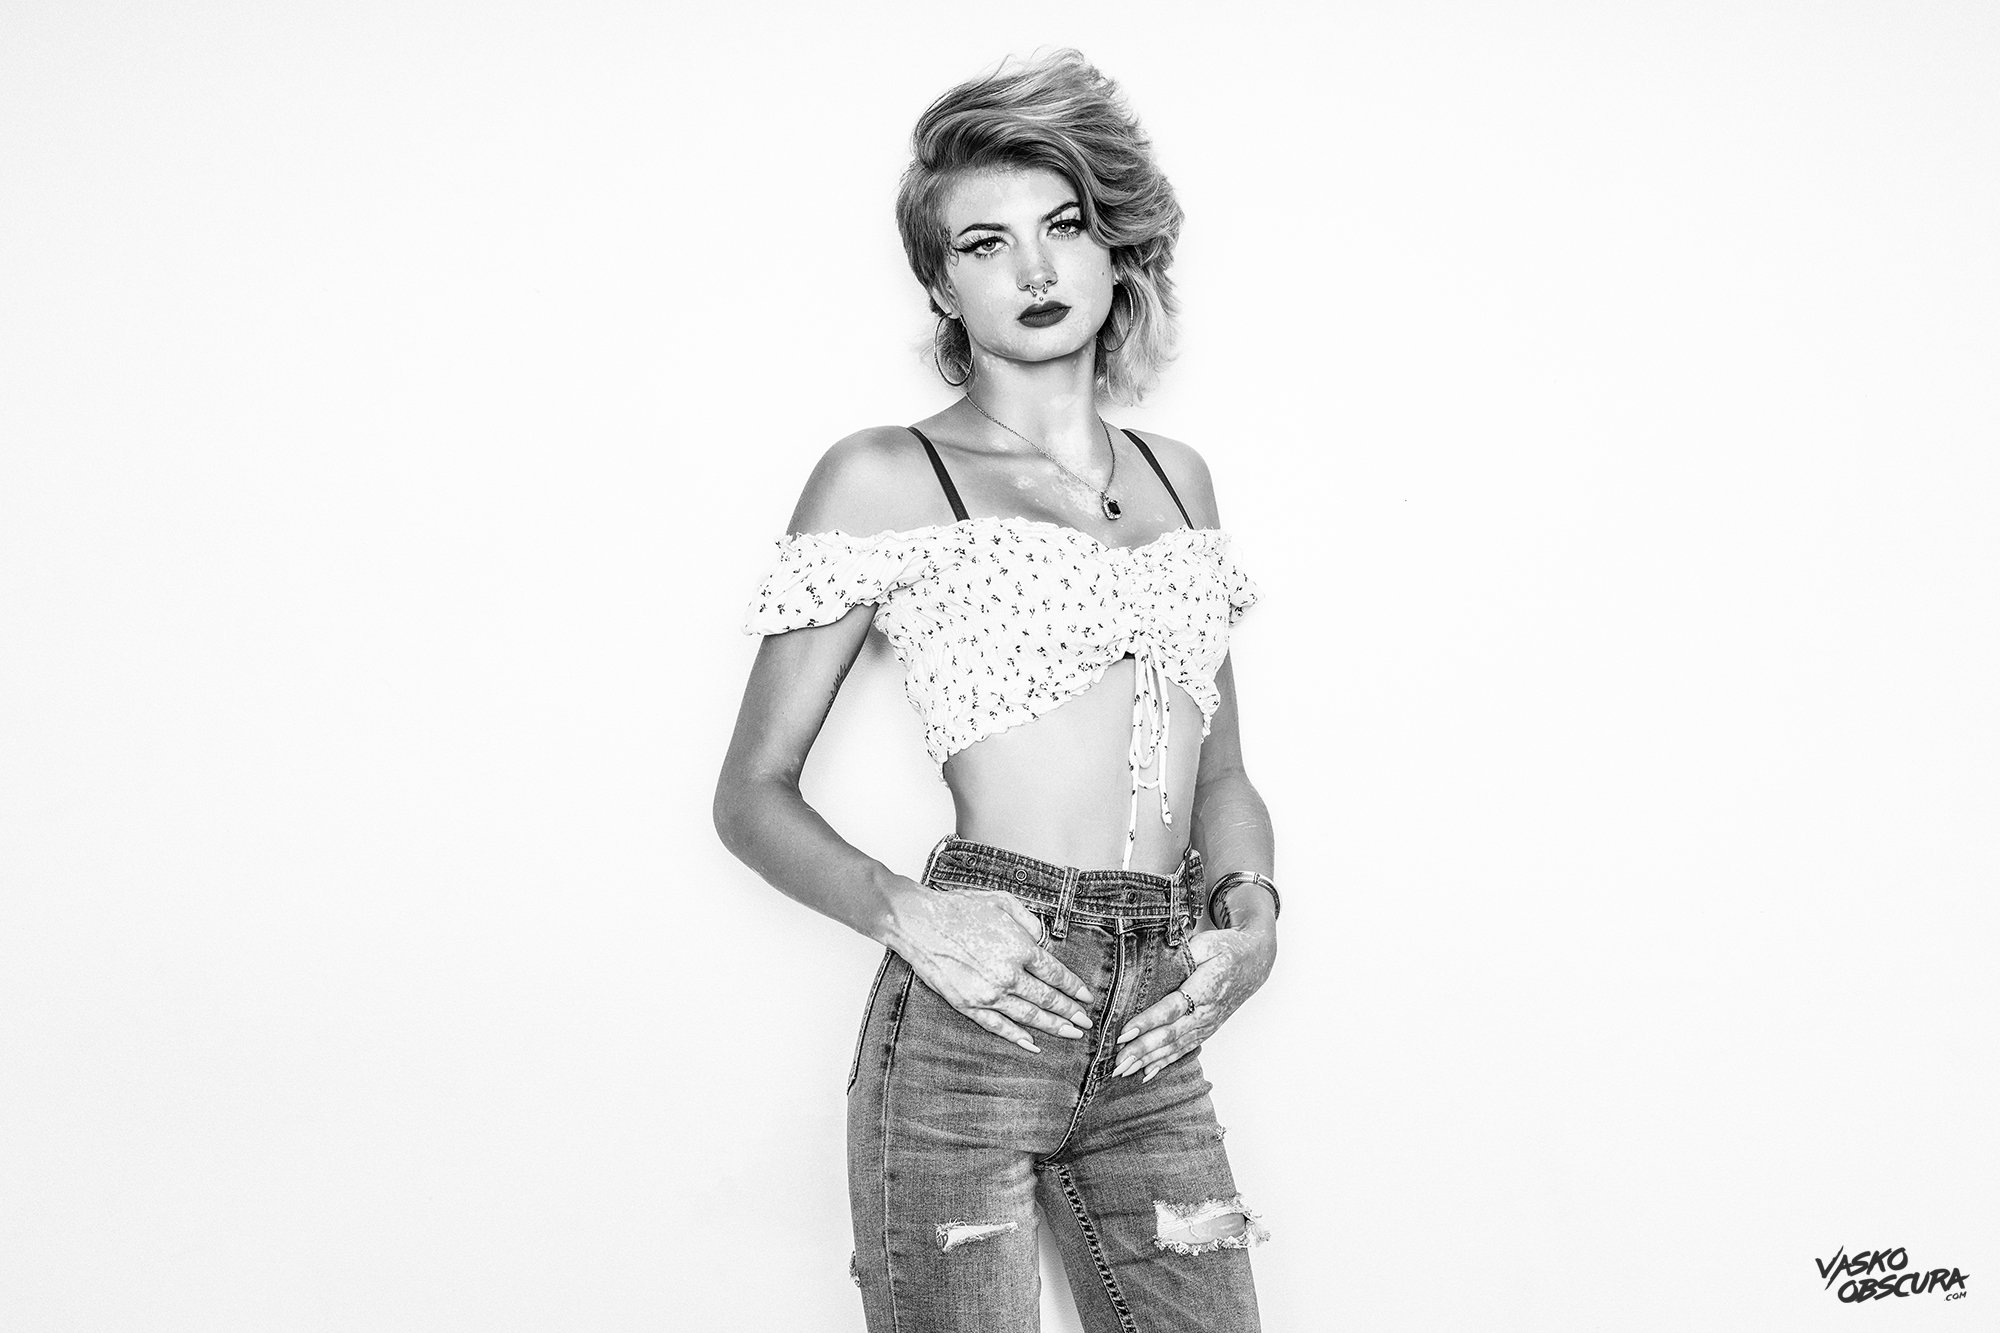

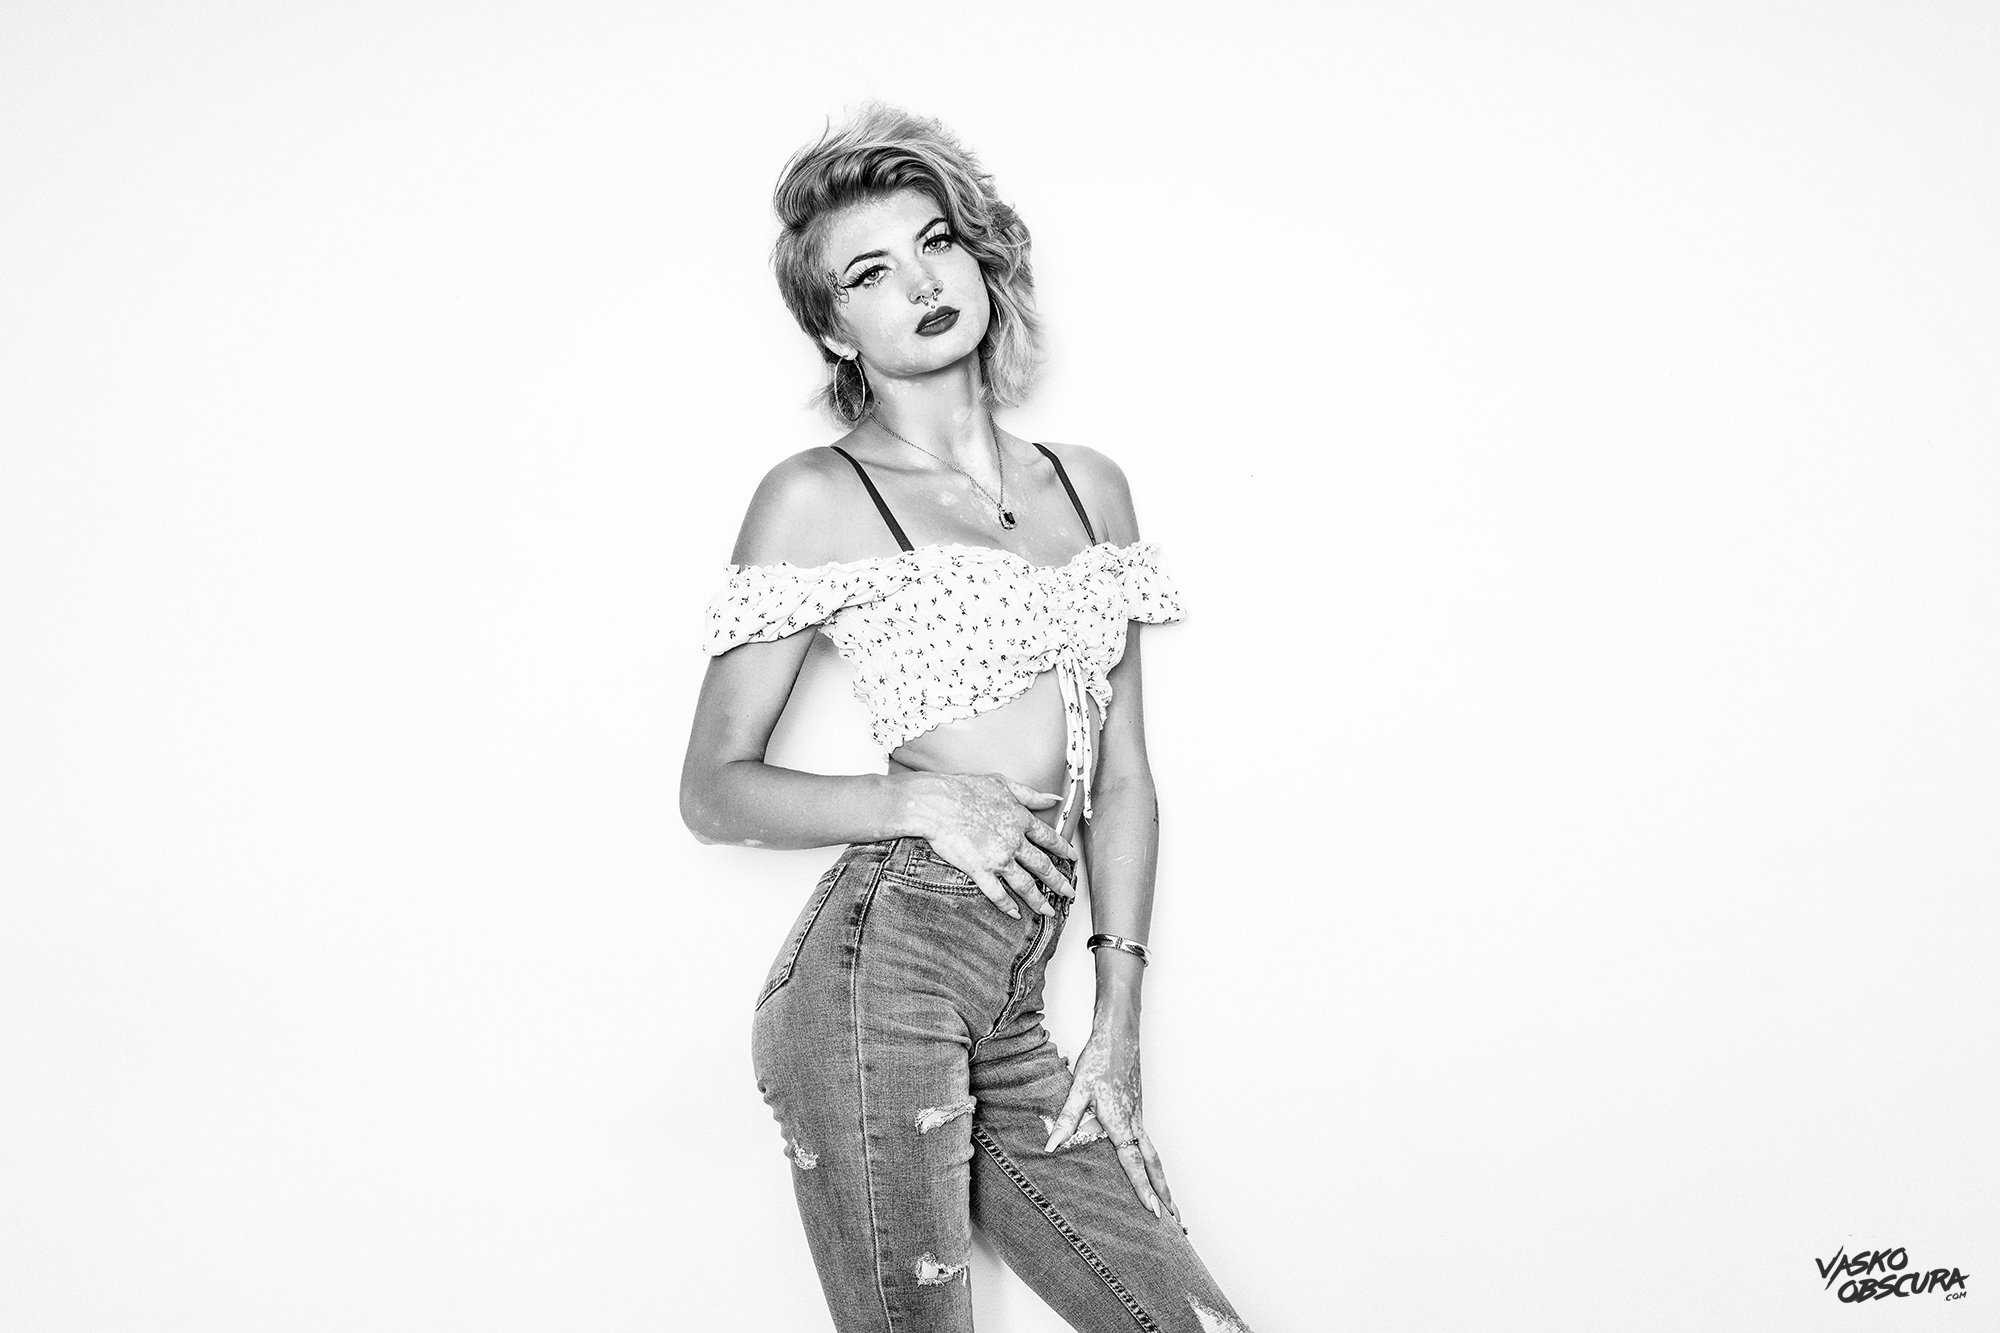


🛸 FEATURING: Meeko Rose Instagram
📸 PHOTOS: EOS R + RF 28-70 f2 L
Key Differences Between These Two Modifiers
| Feature | Parabolic Umbrella | Reflector (11” Throw) |
|---|---|---|
| Light Quality | Soft | Hard |
| Shadow Style | Smooth, gradual | Sharp, defined |
| Coverage | Wide | Narrow |
| Power Efficiency | Lower (light spreads) | Higher (light focused) |
| Overall Look | Natural, clean | Dramatic, high contrast |
How Light Position Affects Shadows
One of the biggest lessons from this shoot: It’s not just the modifier, it’s how you position it.
With the umbrella:
Moving closer = softer, brighter light
Shadows stay gentle and flattering
With the reflector:
Moving it higher creates strong shadows under the chin
Moving it sideways stretches shadows across the wall
Distance controls shadow sharpness and size
This is where you start shaping the image instead of just lighting it.
Real-World Results From My Shoot
Here’s what stood out when reviewing the images:
With the umbrella:
Skin tones looked smooth and natural
Shadows under the eyes and chin were subtle
The overall look was clean and “commercial-ready”
With the reflector:
Shadows became part of the composition
Some shadows enhanced the image (adding shape and depth)
Others became distracting (pulling attention away from the face)
That’s the key difference:
👉 Soft light is forgiving
👉 Hard light is intentional
Which Light Modifier Should You Choose?
If you’re just getting into studio lighting:
Start with a parabolic umbrella
Learn how light wraps and behaves
Get comfortable with exposure and positioning
Then move to a reflector when you want to:
Add drama
Control shadows
Create a specific mood
You don’t need a complicated setup. Most of this shoot was done with just one light.
🏆 If you want to take your shoot to the next level try using both light modifiers at the same time. You can use the umbrella to cast light over your whole scene to create a nice even light. Then you can use the reflector to create contrast. For example if you put the reflector behind the model you can use it as a hair light. Or if you point the reflector at your model’s face and expose for the model’s face you can create a shot where the face is bright and the background is light but slightly dimmer. This looks is often called Hollywood lighting.
🎯 Bonus Tip: Increase Contrast in Studio Photos
Here’s something I’ve learned after years of shooting. Try using a circular polarizer filter in the studio. It’s subtle, but it can:
Keep shadows richer
Reduce blown highlights
Add a bit more contrast
You can also experiment with a light ND filter for a similar effect.
Final Thoughts
If you’re serious about learning studio lighting, don’t overcomplicate it. Start simple:
One light
One modifier
One subject
Then experiment. Understanding the difference between soft and hard light is one of the biggest breakthroughs you’ll have as a photographer—and this comparison is one of the fastest ways to get there.
🚀 EQUIPMENT USED TO MAKE THIS VIDEO
⭐86” Soft Silver PLM™ Umbrella https://www.paulcbuff.com/Light-Modifiers/PLM-Umbrellas/86-Soft-Silver-PLM-Umbrella.html
⭐11" Long Throw Reflector https://www.paulcbuff.com/Light-Modifiers/Reflectors/11-Long-Throw-Reflector.html
Canon EOS R - https://amzn.to/3troRPY
Canon EOS R7 - https://amzn.to/3XP4iw6
Canon RF 28-70mm f2 L - https://amzn.to/3V4nN28
NiSi True Color Circular Polarizer - https://amzn.to/3YdjJxH