
TRS vs TRRS Cables Explained: A Beginner’s Guide to Better Audio for Video

If you’re new to video creation, you’ve probably discovered that great visuals mean nothing without clear audio. One of the most common sources of confusion for new videographers is understanding TRS vs TRRS cables and knowing which one to use for your camera, mic, or phone. In this guide, you’ll learn exactly what TRS and TRRS cables are, how they work, when to use each, and how choosing the right cable can instantly upgrade your production quality.
📑 Table of Contents
Why Audio Cables Matter in Video Production
Many beginners focus on cameras, lenses, and lighting, but audio quality is what separates amateur videos from professional ones. A mismatched cable can cause:
No sound at all
Extremely quiet recordings
Static or distortion
One-sided audio
Understanding TRS and TRRS cables helps you avoid these problems and gives you more control over your sound setup.
What Is a TRS Cable?
TRS stands for, Tip Ring Sleeve. A TRS connector has three metal sections separated by two black rings.
🔹 What TRS Is Used For
TRS cables are designed mainly for:
Cameras
Audio recorders
External microphones
Mixers
Headphones (without mic)
They carry stereo audio or mono microphone signals and are the standard for most dedicated video gear.
🔹 Where You’ll See TRS
Most cameras from brands like Sony use TRS microphone inputs. If you’re plugging a wireless mic receiver or shotgun mic into a camera, it almost always uses TRS.
What Is a TRRS Cable?
TRRS stands for, Tip Ring Ring Sleeve. (I know a very creative name how did they come up with that) A TRRS connector has four metal sections separated by three black rings.
🔹 What TRRS Is Used For
TRRS cables are designed mainly for:
Smartphones
Tablets
Laptops with combo headphone/mic jacks
Headsets with built-in microphones
They can carry:
Stereo audio (left/right)
Microphone signal
Ground
All in one cable.
🔹 Why TRRS Exists
Phones and laptops combine headphones and microphones into one port. TRRS makes this possible by adding an extra contact for the mic.
TRS vs TRRS: Key Differences
trs vs trrs audio jack diagram
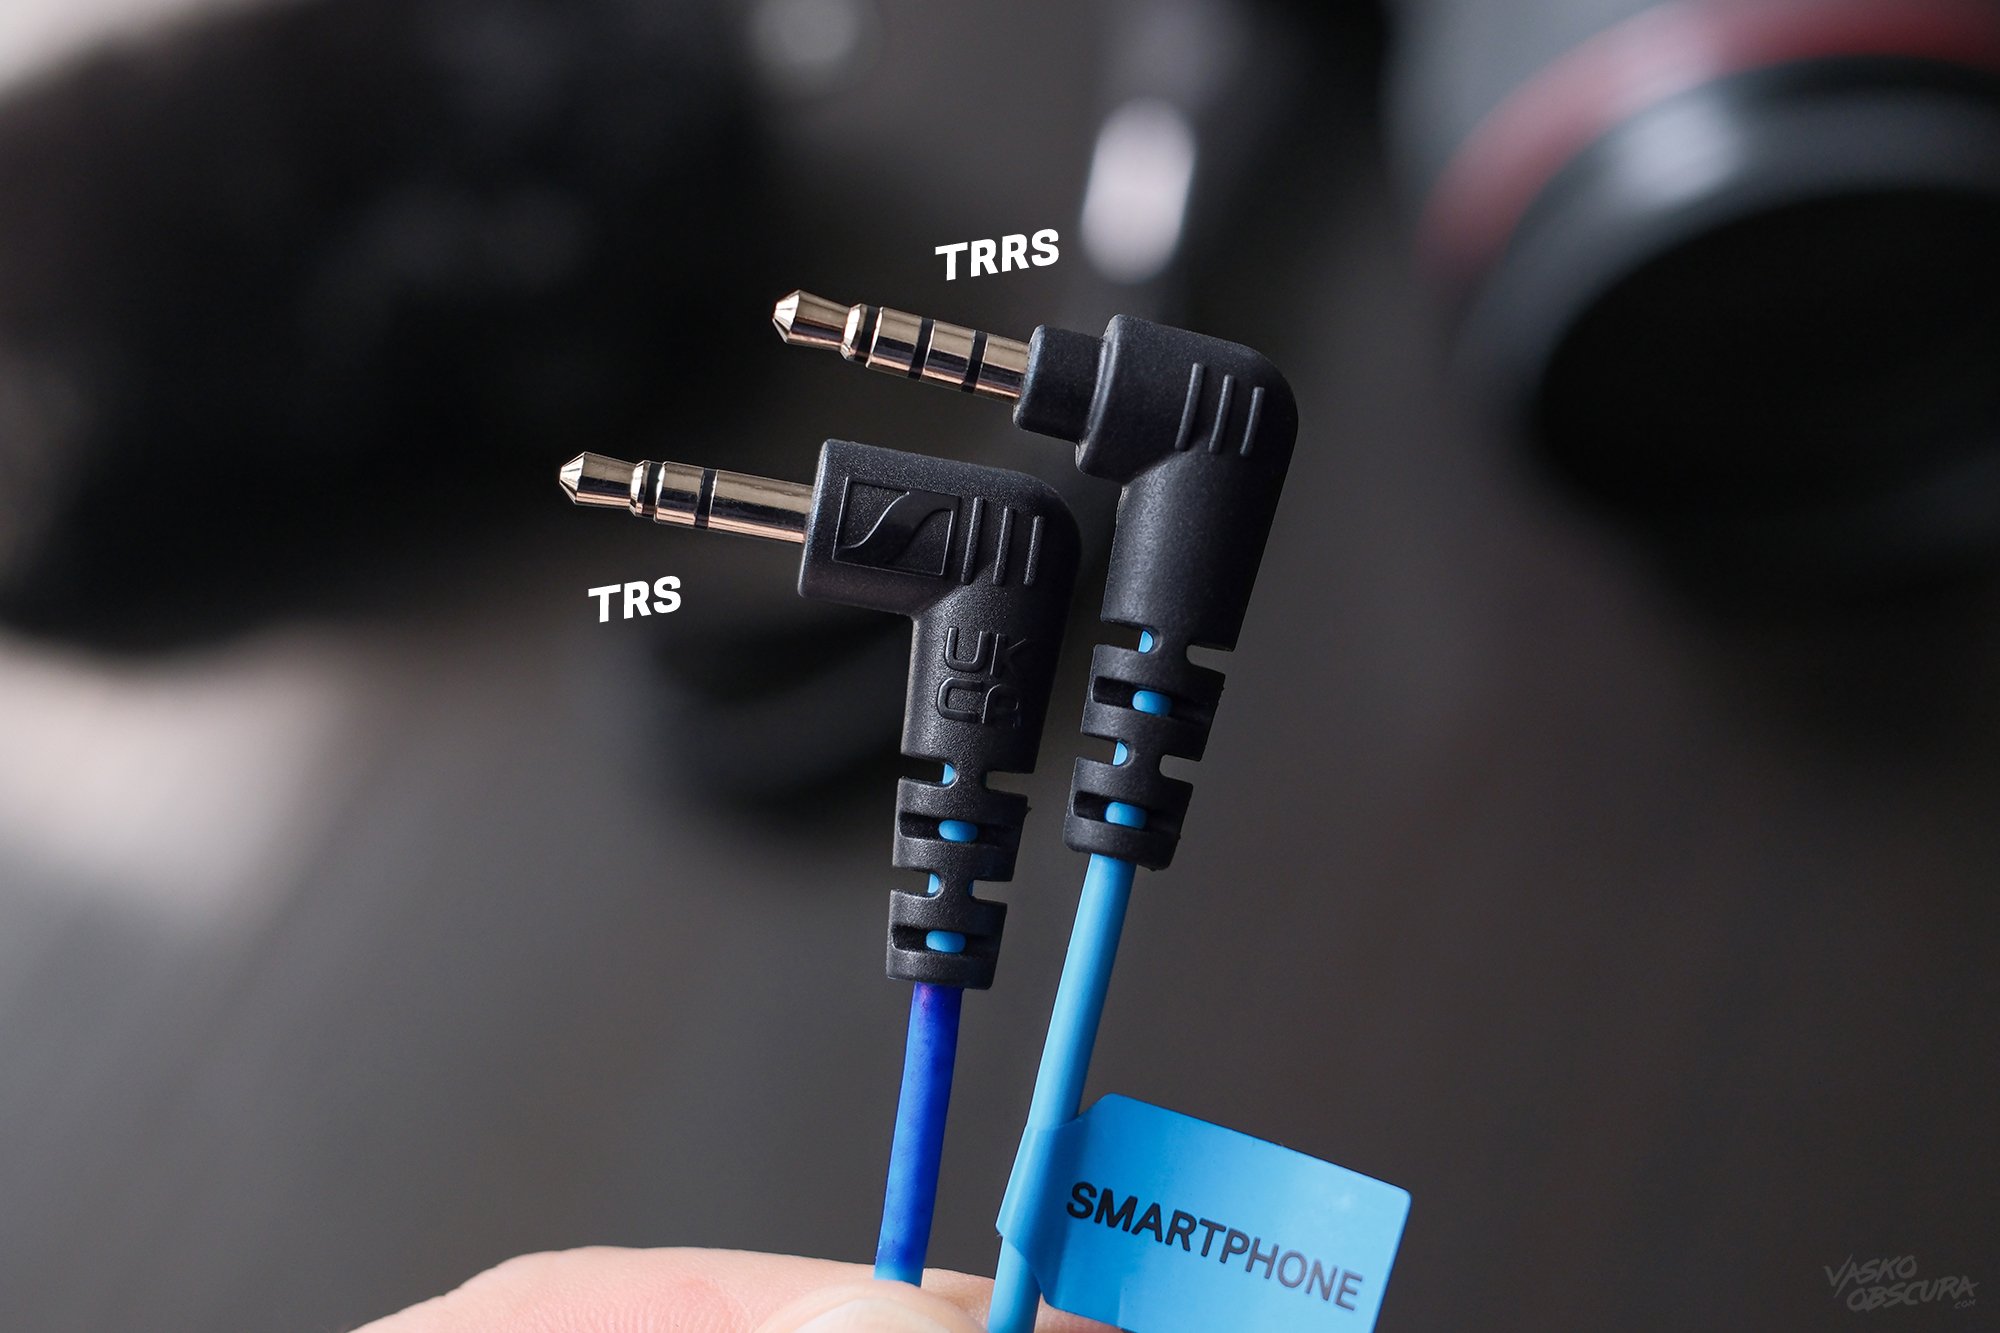
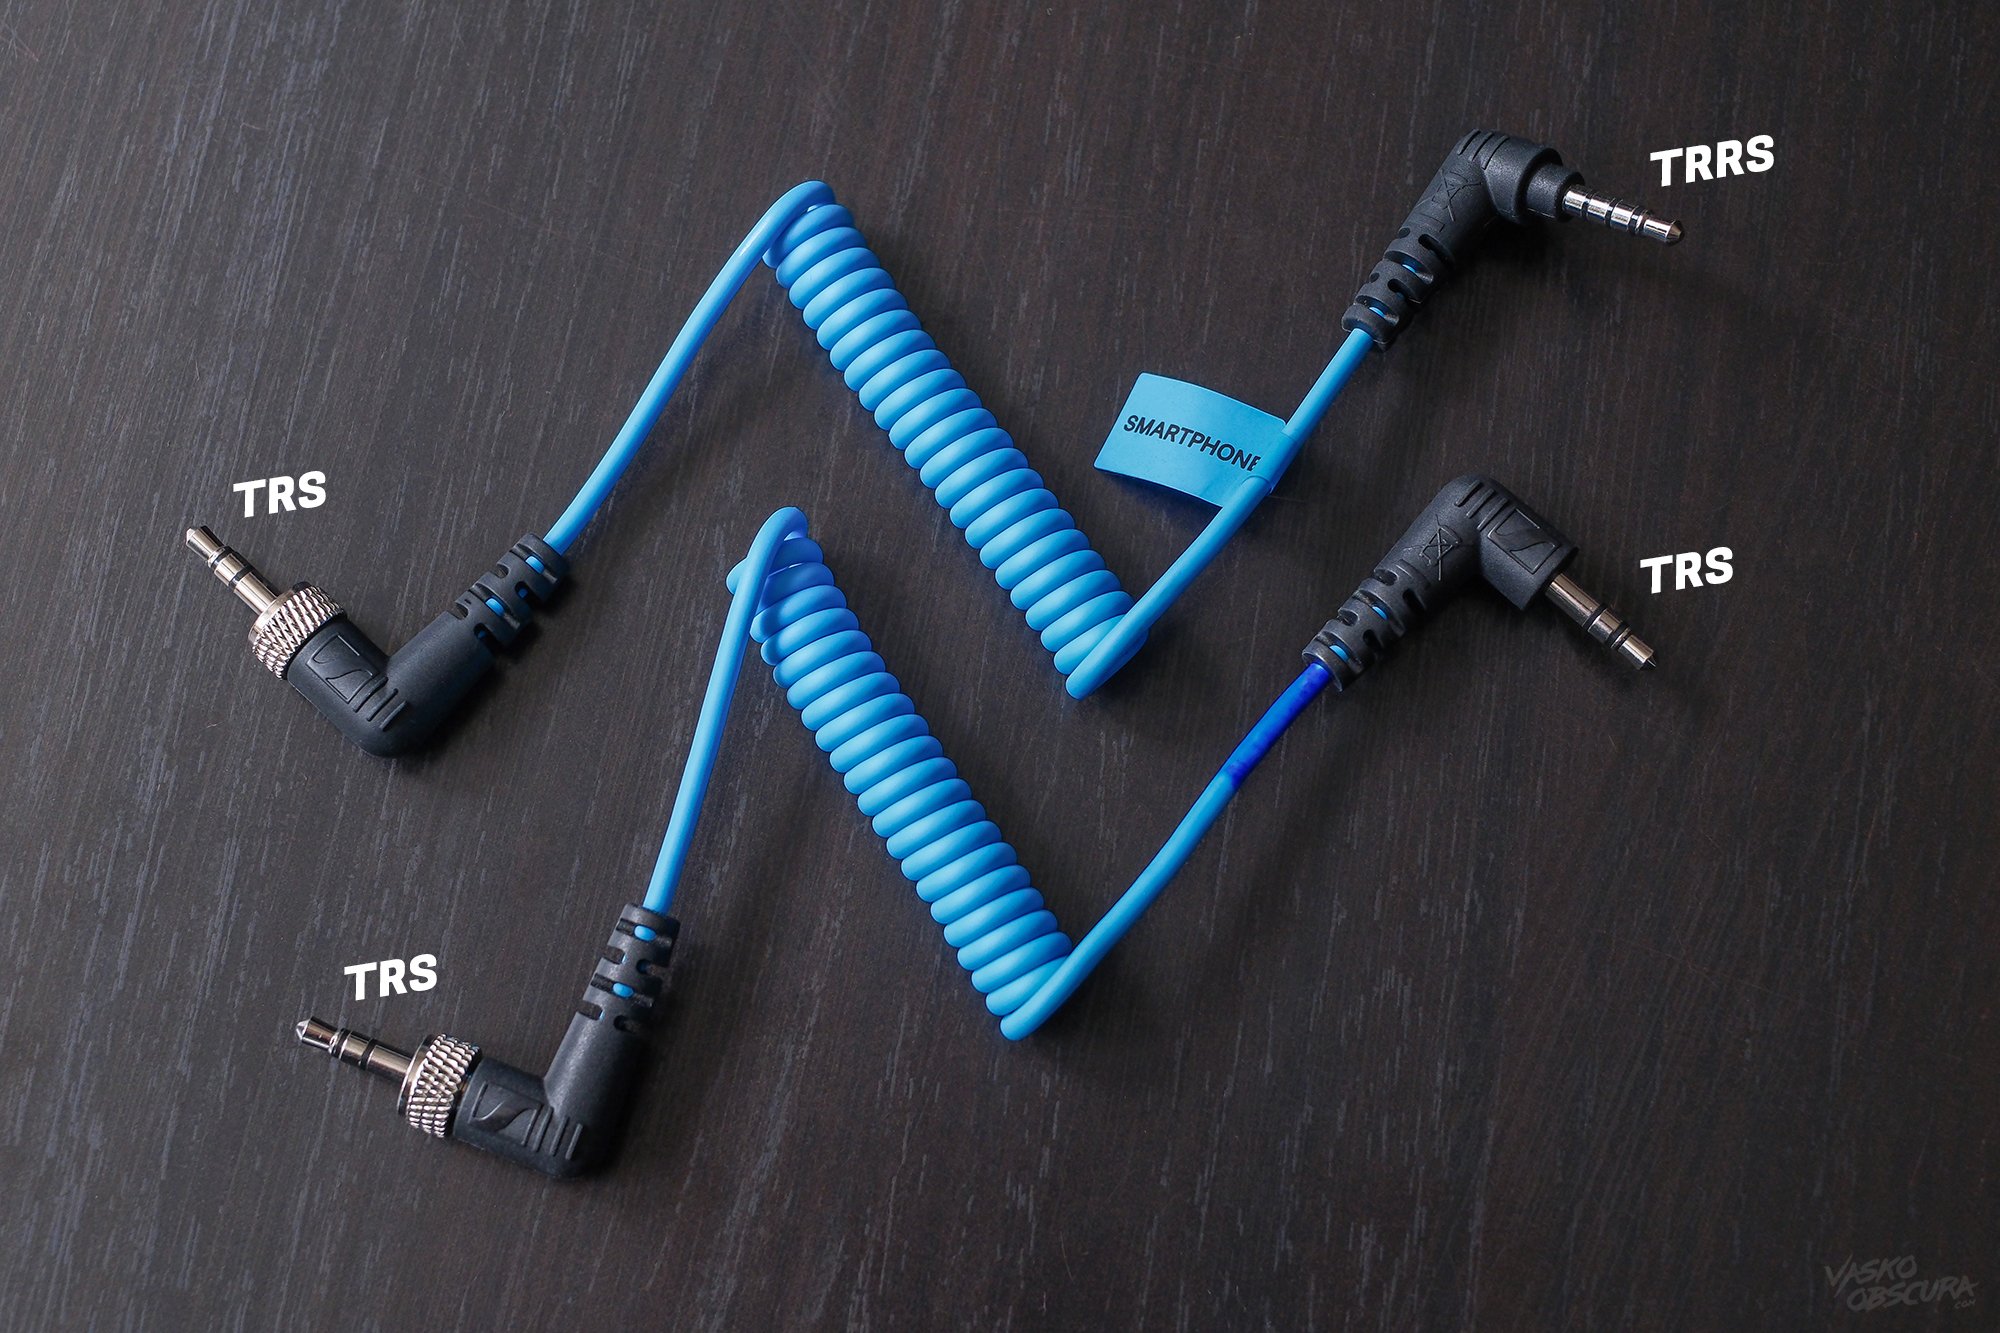
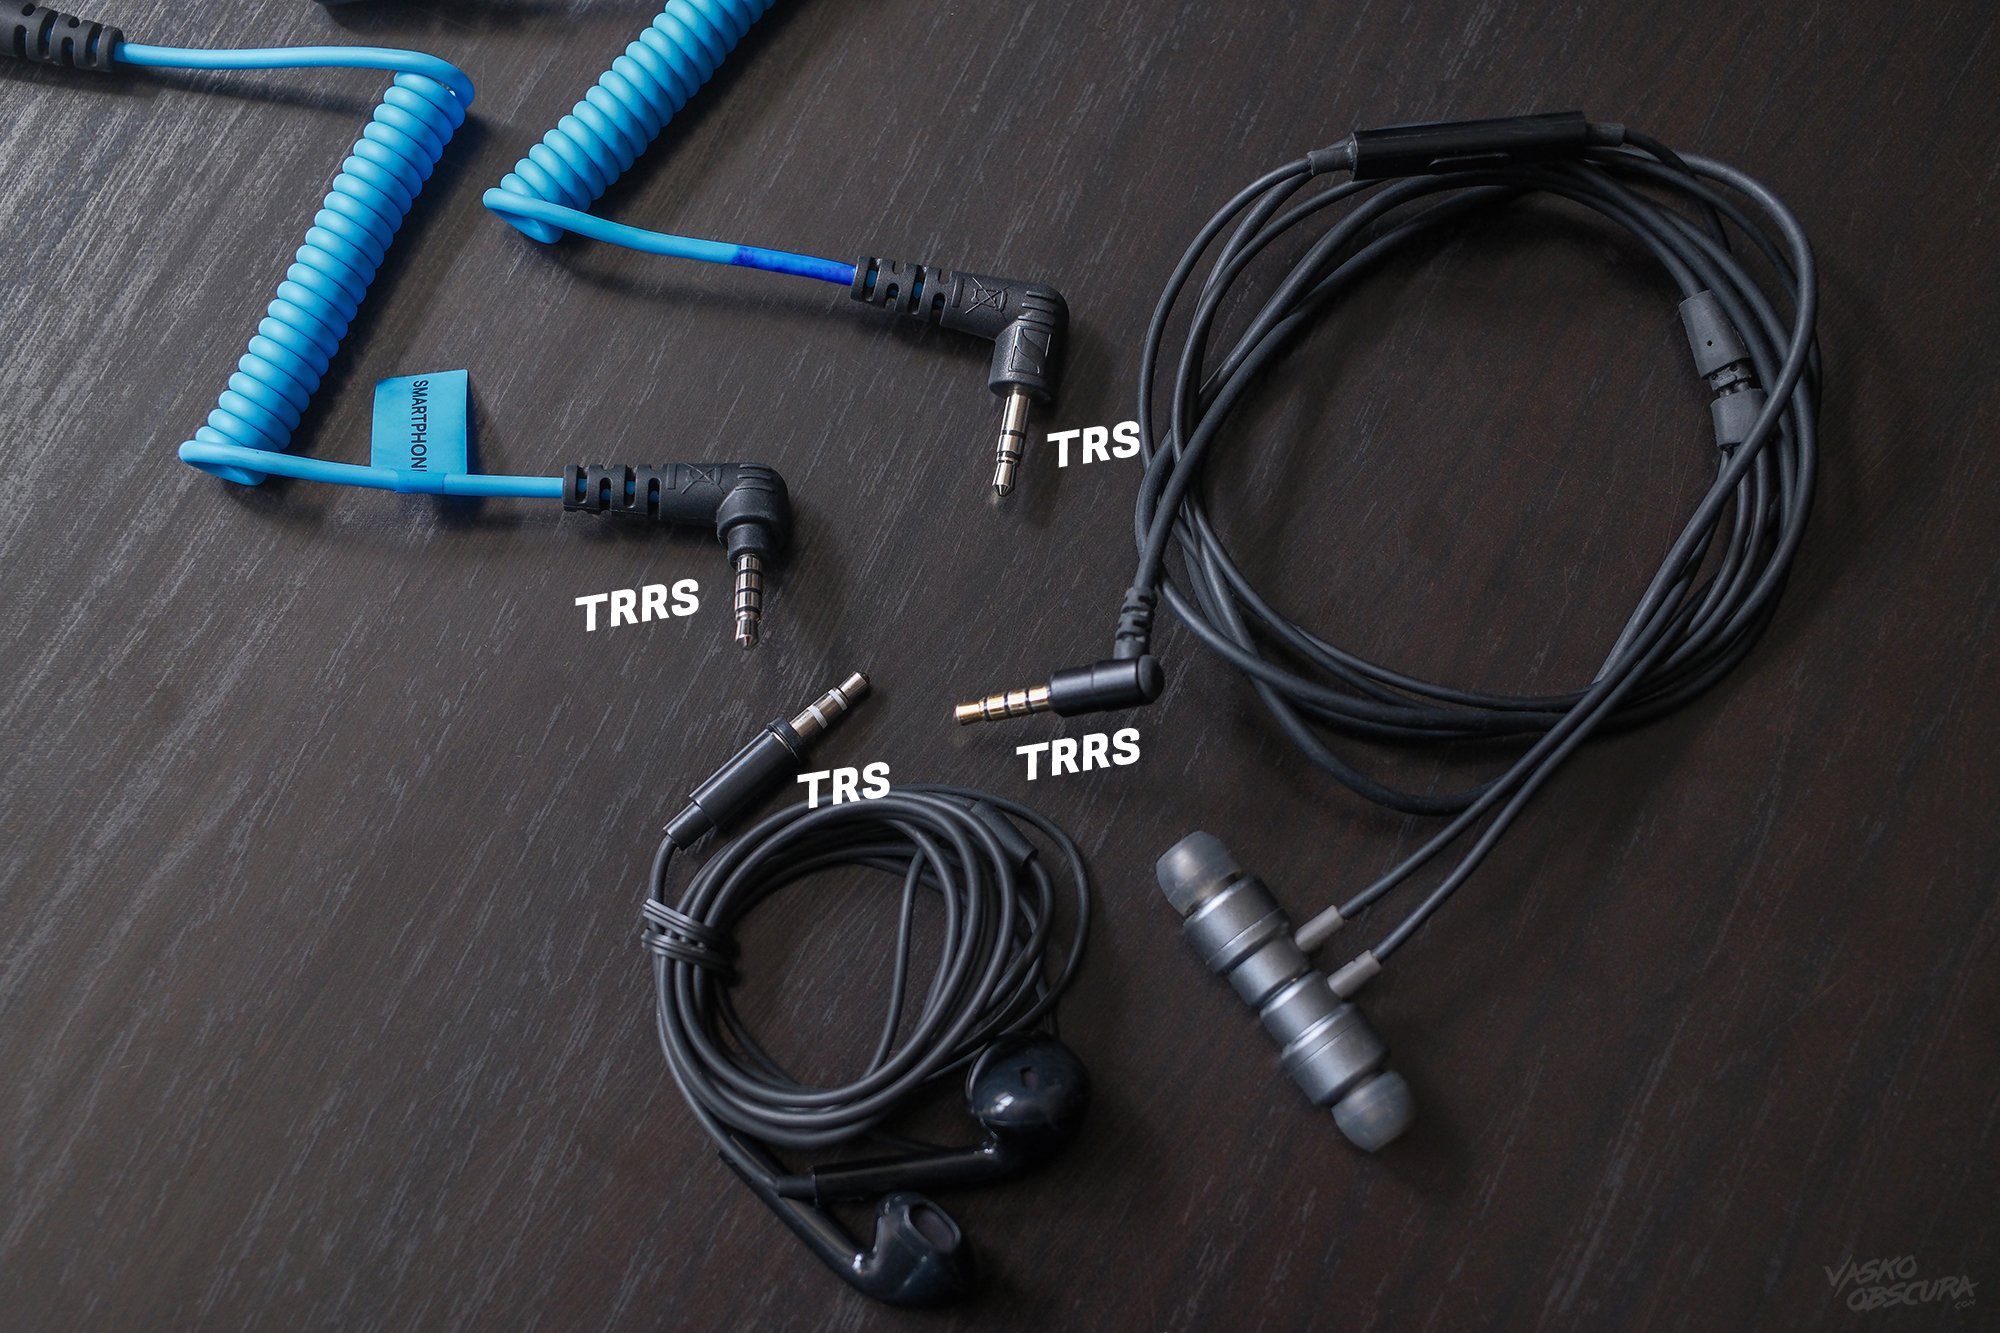
At first glance, TRS and TRRS cables look almost identical. The easiest way to tell them apart is by counting the black rings on the plug. These rings separate the metal sections that carry audio signals.
What This Means in Practice
The biggest difference between TRS and TRRS cables is what devices they are designed to work with.
TRS cables are made for cameras, audio recorders, and professional microphone systems.
TRRS cables are made for phones, laptops, and headsets that combine headphones and microphones into one port.
Quick Rule to Remember
If you’re ever unsure, remember this simple guide:
👉 TRS = Cameras & Audio Gear
👉 TRRS = Smartphones & Headsets
Knowing this one rule will help you avoid most audio connection problems and and give you peace of mind.
TS Cables
You may also come across TS cables. They aren’t directly relevant to microphones used for video recording, so I won’t go too deep here, but it’s helpful to understand what they are for context.
A TS (Tip Sleeve) audio jack is the simplest type of analog audio connector, consisting of just two electrical contacts, the tip and the sleeve. Because it carries only a single audio signal plus ground, a TS cable transmits mono audio, not stereo sound.
TS connectors are most commonly used with electric guitars, bass guitars, keyboards, and other musical instruments, as well as older analog audio equipment where only one audio channel is required. While you’ll rarely encounter TS cables in modern video or content creation setups, they remain a standard connection in musical instruments and professional audio gear, particularly for unbalanced instrument-level signals.
ts vs trs vs trrs audio jack diagram
When to Use TRS Cables
You should use a TRS cable when connecting to:
🎥 Cameras
Most mirrorless and DSLR cameras expect TRS input.
Example uses:
Wireless mic receiver → Camera
Shotgun mic → Camera
Lavalier system → Camera
🎙️ Audio Recorders
Portable recorders and interfaces usually use TRS inputs.
🎧 Monitoring Headphones
Many studio headphones use TRS connectors for clean stereo monitoring.
✅ Use TRS If:
You’re recording directly to a camera
You’re using professional audio equipment
You’re not connecting to a phone
6. When to Use TRRS Cables
You should use a TRRS cable when connecting to:
📱 Smartphones
Phones with headphone jacks require TRRS for microphones.
💻 Laptops & Tablets
Many laptops use combo audio ports that need TRRS.
🎧 Headsets
Gaming and call-center headsets use TRRS.
✅ Use TRRS If:
You’re recording on a phone
You’re live streaming on mobile
You’re using a headset mic
Using Adapters: Making Cables Compatible
Sometimes you’ll need to mix TRS and TRRS equipment. That’s where adapters come in.
🔁 Common Adapters
TRRS → TRS Adapter
Use this when:
Your mic outputs TRRS
Your camera needs TRS
This converts “phone-style” signals into “camera-style” signals.
TRS → TRRS Adapter
Use this when:
Your mic outputs TRS
You’re recording on a phone
This adapts camera mics for smartphone use.
⚠️ Important TipS
Not all adapters work both ways. Always check: “TRRS to TRS” or “TRS to TRRS” before buying.
Most professional microphones use XLR outputs. You can also buy an XLR to TRS adapter but your XLR mic will have to be powered.
Common Beginner Mistakes to Avoid
don’t use a trrs connector with your camera
❌ Mistake 1: Plugging TRRS Directly Into a Camera
Result: No audio or distorted sound. Trust me I’ve shown up to shoots with the wrong cable. Always remember to bring your monitoring headphones to check audio.
❌ Mistake 2: Assuming All 3.5mm Cables Are the Same
They look identical to the untrained eye but function very differently. Congratulations after reading this blog post you poses a trained eye!
❌ Mistake 3: Ignoring Channel Testing
Always record a short test clip and listen back. Trust me this tip saved my butt so many times. Don’t get overly confident and assume everything is good because you can see your db meter bouncing around. Always listen and check before you start.
❌ Mistake 4: Buying the Cheapest Cable
Low-quality cables introduce noise and interference. There is a saying I learned: Poor man pays twice: What that means is if you buy the cheap cables they’re going to produce bad audio then you’ll get annoyed and end up buying the better quality cables anyway. SO now you’ve paid twice. Just buy the good quality cables the first time and save money.
Quick Buying Guide for Videographers
If you’re just getting started with video and want better sound quality, choosing the right audio cables is an important first step. For recording directly to a camera, most videographers should purchase a 3.5mm TRS to TRS cable, which is the standard connection for external microphones and wireless receivers that are not XLR. Adding an optional TRRS to TRS adapter is also recommended, as it allows you to use smartphone-style microphones with your camera when needed. If you plan to record on a phone, tablet, or laptop, you’ll need a TRRS cable to support both audio playback and microphone input, along with a TRS to TRRS adapter if you are using a camera microphone. For the most flexibility, beginners should consider building a small starter kit that includes a TRS cable, a TRRS cable, both types of adapters, and a compact carrying pouch. This simple setup prepares you for nearly any recording situation, helps you avoid compatibility issues, and ensures you’re ready to capture clear, professional-quality audio wherever you shoot.
Final Thoughts: Mastering Audio for Better Videos
audio jack cheat sheet - when to use which connector
Understanding the difference between TRS and TRRS audio cables might seem like a small detail, but it can have a huge impact on your video quality. Many beginner videographers struggle with silent recordings, poor audio syncing, or confusing gear setups, issues that are easily avoided once you know which cable to use. TRS cables are ideal for cameras and professional audio equipment, while TRRS cables are designed for smartphones and headsets. Using the right cable, or adapters when mixing systems, not only saves you money but also helps you troubleshoot faster and look more professional on set. Remember, great videographers aren’t just skilled with cameras, they know how to capture clean, clear sound. Mastering these audio basics builds a strong foundation for high-quality videos, smoother production, and storytelling that truly engages your audience. Hope this blog post was simple direct and to the point. There you go now you know some audio basics. If you like this kind of content subscribe to the YouTube channel and/or blog feed so you can keep up with all the tutorials.
🤓 Read Next:
Learn to Setup Any Lav Mic
How to Get Better Audio from the DJI Mic 2 (Pocket 3 Creator Combo)